
Let's explore a digital game mechanic...LUCK
Follow our step-by-step guides below and game glossary to
jump into game design
01 Build a Random Number Generator
Just like in desktop games, luck can be a powerful game mechanic in all types of digital games. Use this to make things happen randomly, like rolling a die. Check out steps below to create a random number generator (RNG) with us below.
WHAT WE ARE BUILDING
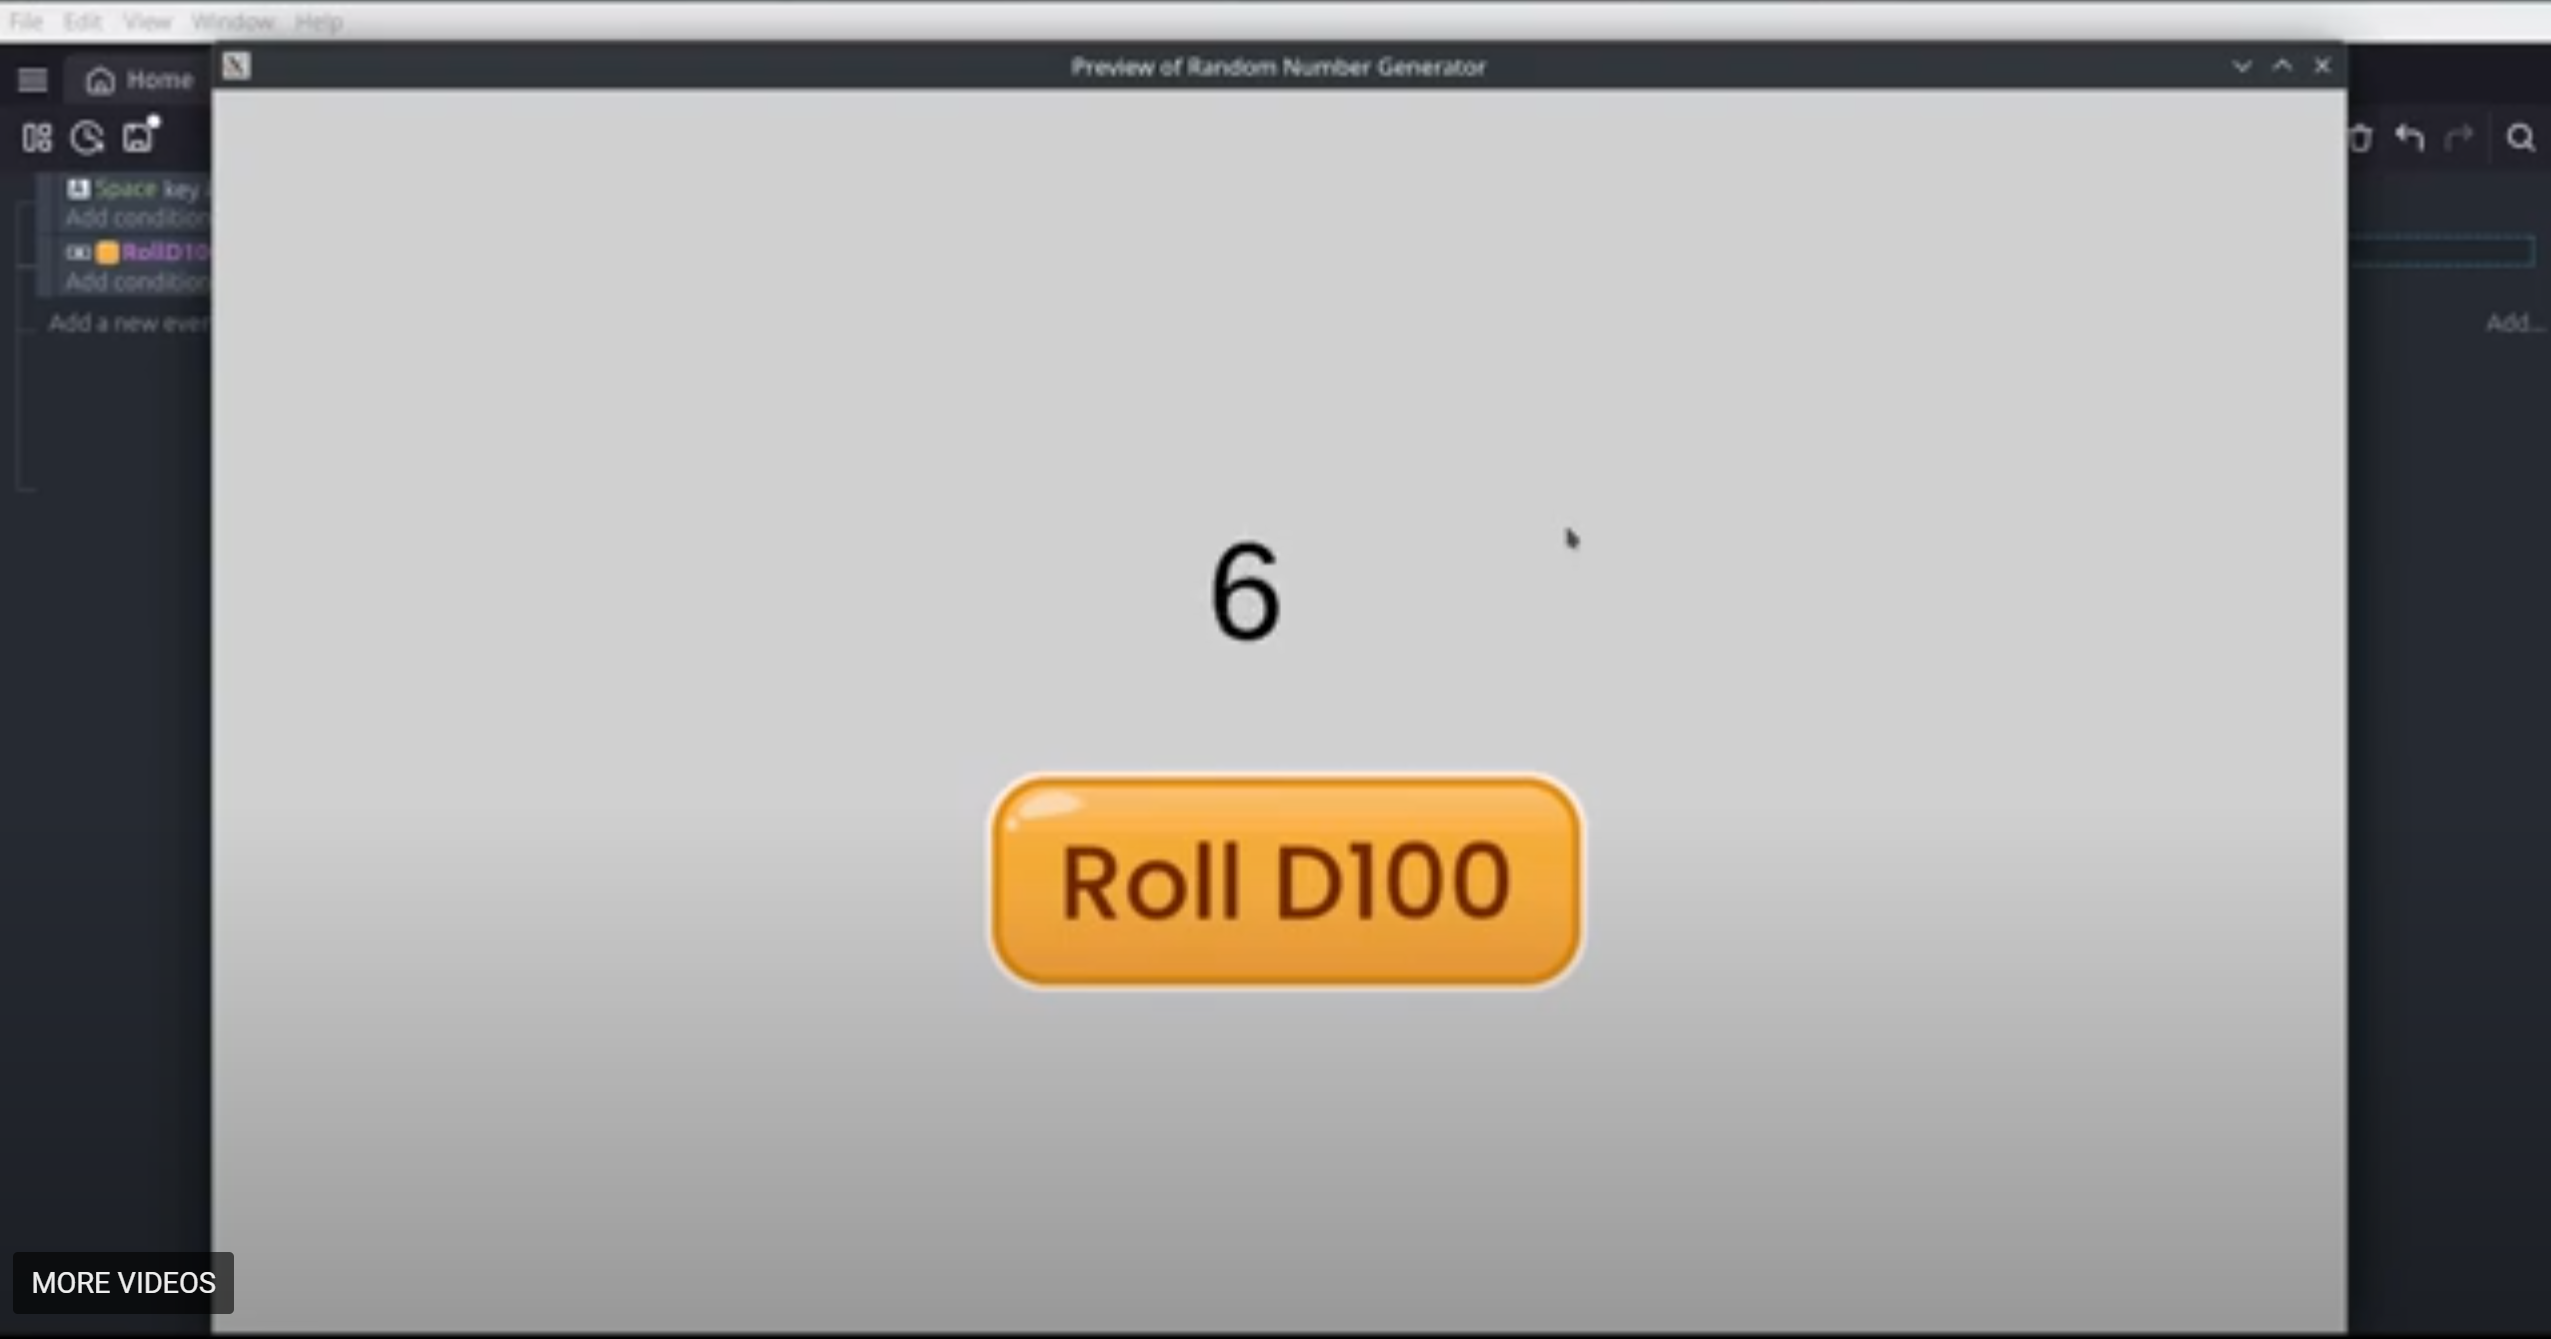
A functioning RNG that can simplify parsing random numbers vs just using a generic rand function. A class that handles all your random number queries with simple commands vs manually asking for them each time. Use this to generate a loot table system to create random drops based on %s
Not sure where to start?
Grab our sample code for steps below at GitHub!
- Open GDevelop and click on "Create a New Project"
- Choose "Empty Project" to start from scratch
- PRO TIP - keep seperate tabs open to jump back and forth between steps and GDevelop

- Click on the "Objects" tab on the right and then click "+ Add a new object"
- Choose "Text" from the list of object types
- Name your text object, such as RandomNumberText, and adjust the text size and font as necessary
- Drag and drop the text object onto your scene to place it
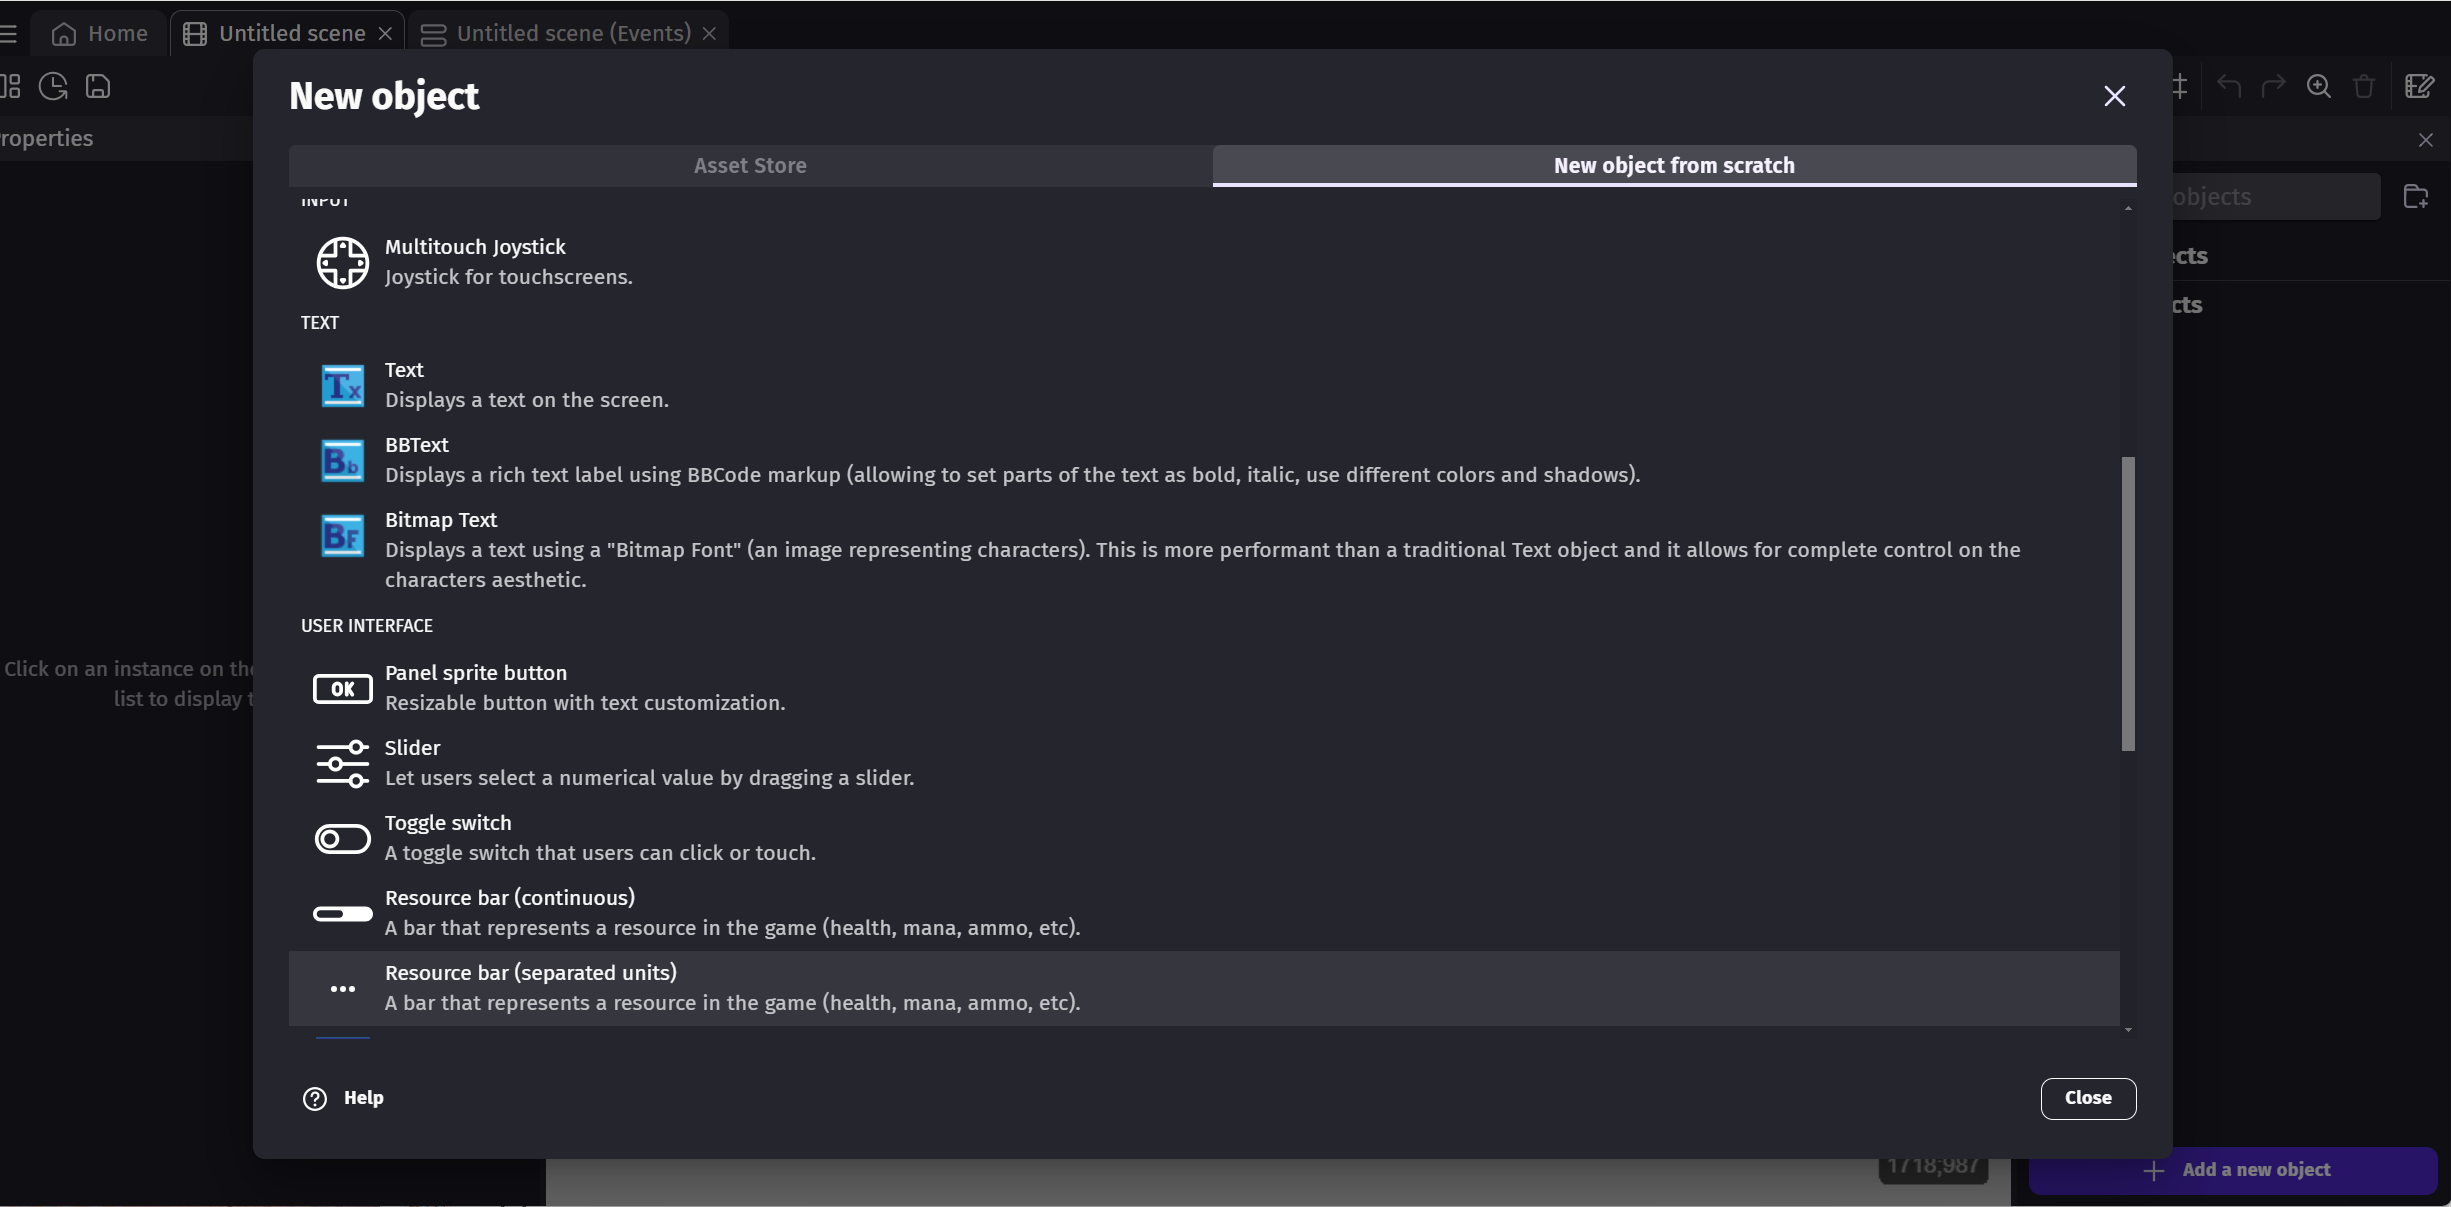
- Click on the "Objects" tab on the right and then click "+ Add a new object"
- Choose "Text" from the list of object types
- Name your instructions text object, such as "InstructionText", and adjust the text size and font as necessary
- Set the initial value to "Press Spacebar to roll D6"
- Drag and drop the text object onto your scene to place it
- Switch to the Events tab at the top of the screen to begin adding logic to your game
- Click on "Add a new event" and select the event to trigger the random number generation. Let's use a "Key Press" event to trigger the action.
- In the Conditions section, click on "Add a condition"
- Search for Key Pressed and select it
- Set the key to "Space"
- In the Actions section of the same event, click on "Add an Action."
- Select "RandomNumberText" from the Objects tab
- Select "Text" in the actions menu
- In the text field, write the expression: ToString(RandomInRange(1, 6))
- When the spacebar is pressed this will generate a random number between 1 and 6 and convert it to text format so that it can be displayed as text in the "RandomNumberText" Object
- Click on the play icon to preview the scene
- When you press the spacebar, the text object should update to display a new random d6 roll each time
- Click on the "Objects" tab on the right and then click "+ Add a new object"
- Choose "Button" from the list of object types
- Name your Button something like "RollD100Button" and adjust the text size and font as necessary
- Set the initial text to "Roll D100"
- Drag and drop the text object onto your scene to place it
- Switch to the Events tab at the top of the screen to begin adding logic to your game
- Click on "Add a new event" and select the event to trigger the random number generation. Let's use a "Button Press" event to trigger the action.
- In the Conditions section, click on "Add a condition"
- Select the "RollD100Button" Object in the Objects tab
- Select the "is pressed" action in the middle conditions menu and click ok to save the condition
- In the Actions section of the same event, click on "Add an Action."
- Select "RandomNumberText" from the Objects tab (We will use the same text to show the number)
- Select "Text" in the actions menu
- In the text field, write the expression: ToString(RandomInRange(1, 100))
- When the spacebar is pressed this will generate a random number between 1 and 100 and convert it to text format so that it can be displayed as text in the "RandomNumberText" Object
- You can change the range of the random number by adjusting the parameters in RandomInRange(1,6)
- You can also trigger the random number generation with other events, like clicking a button or after a certain amount of time passes
02 Using RNG
Check out some ways to use RNG in a game context and explore how to manipulate and fine tune things quickly.
Check out steps to use a RNG in your game
- You can jump into one of our game templates to see how RNG used in a game
- PRO TIP - feel free to grab and reuse templates to learn and get you on your way!
- Check out GDevelop Documentation wiki here
- GDevelop RNG tutorial on YouTube

Explore another digital game mechanic...CHOICE
03 Build a Decision Tree
Choice is in almost all games both desktop and digital
What step to do next?
Which direction to go?
What tool to use? What to wager?
Almost everything come down to player choice!
Let's explore the choice mechanic through a simple decision tree
WHAT WE ARE BUILDING
A functioning choice tree that can handle different decisions made by the user and present new information based on previous choices. This allows us to create systems for branching dialogue or "choose your own adventure" style systems. We will also learn about resetting to our initial state so that we can start over without having to restart the game preview.
Not sure where to start?
Grab our sample code for steps below at GitHub!
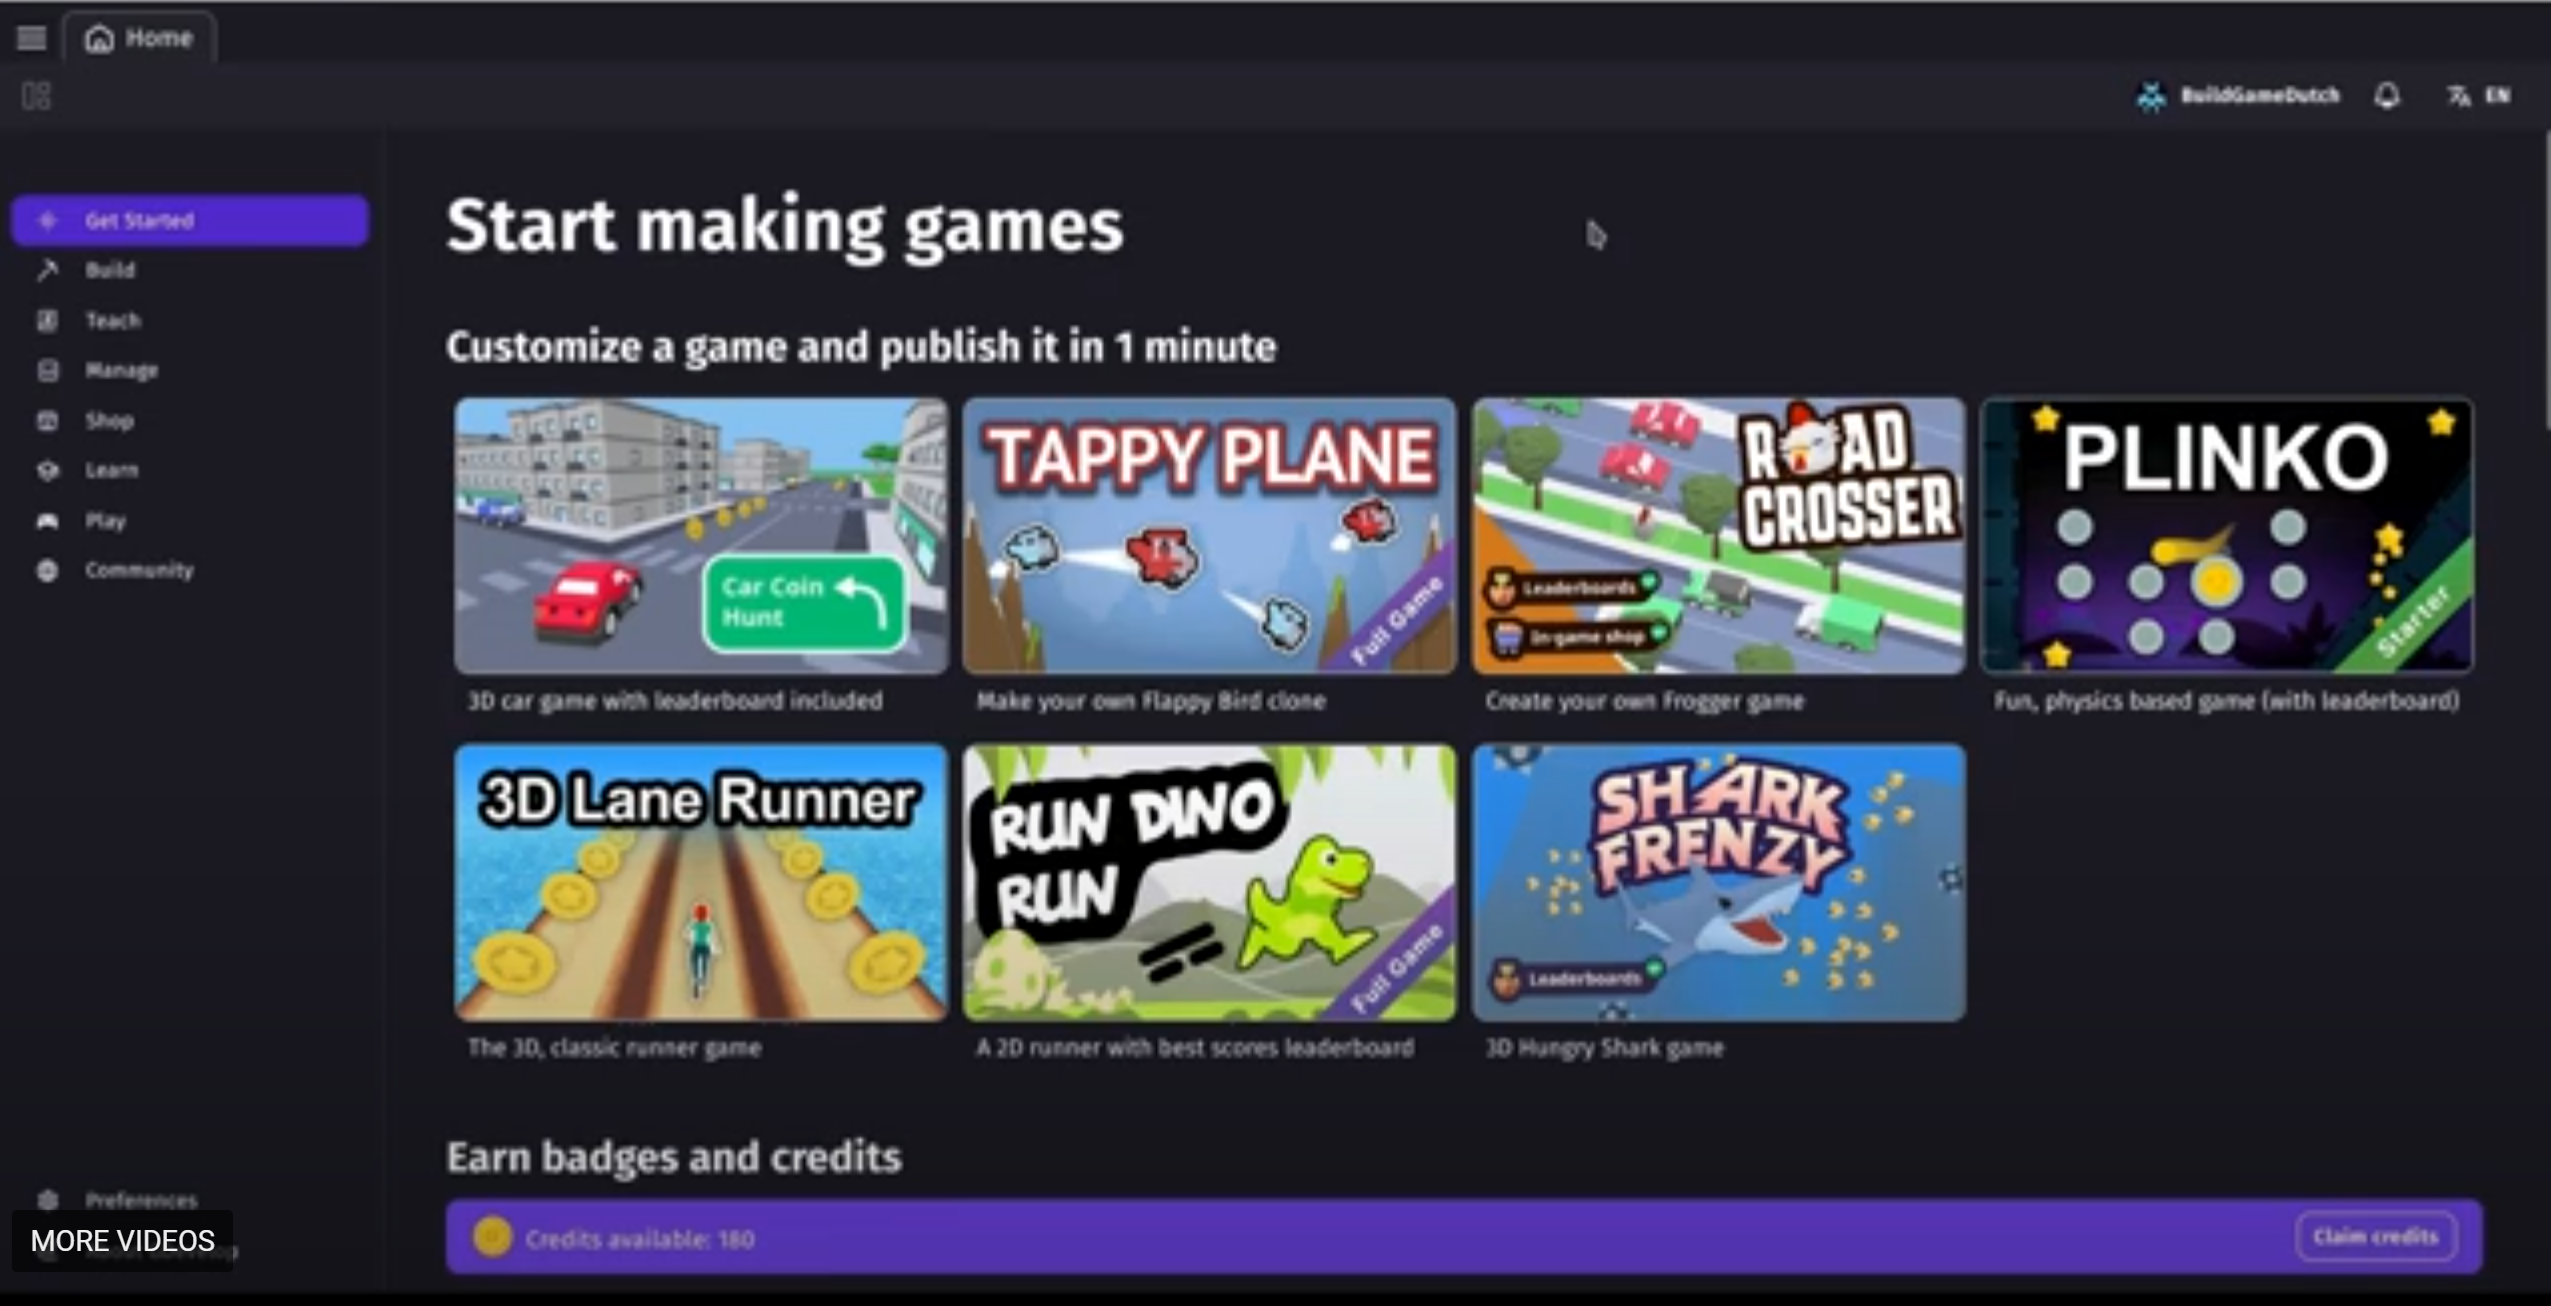
- Open GDevelop and click on "Create a New Project."
- Choose any template or select "Empty Project" to start from scratch.
- PRO TIP - Add to an existing project or start new to explore mechanics in different contexts
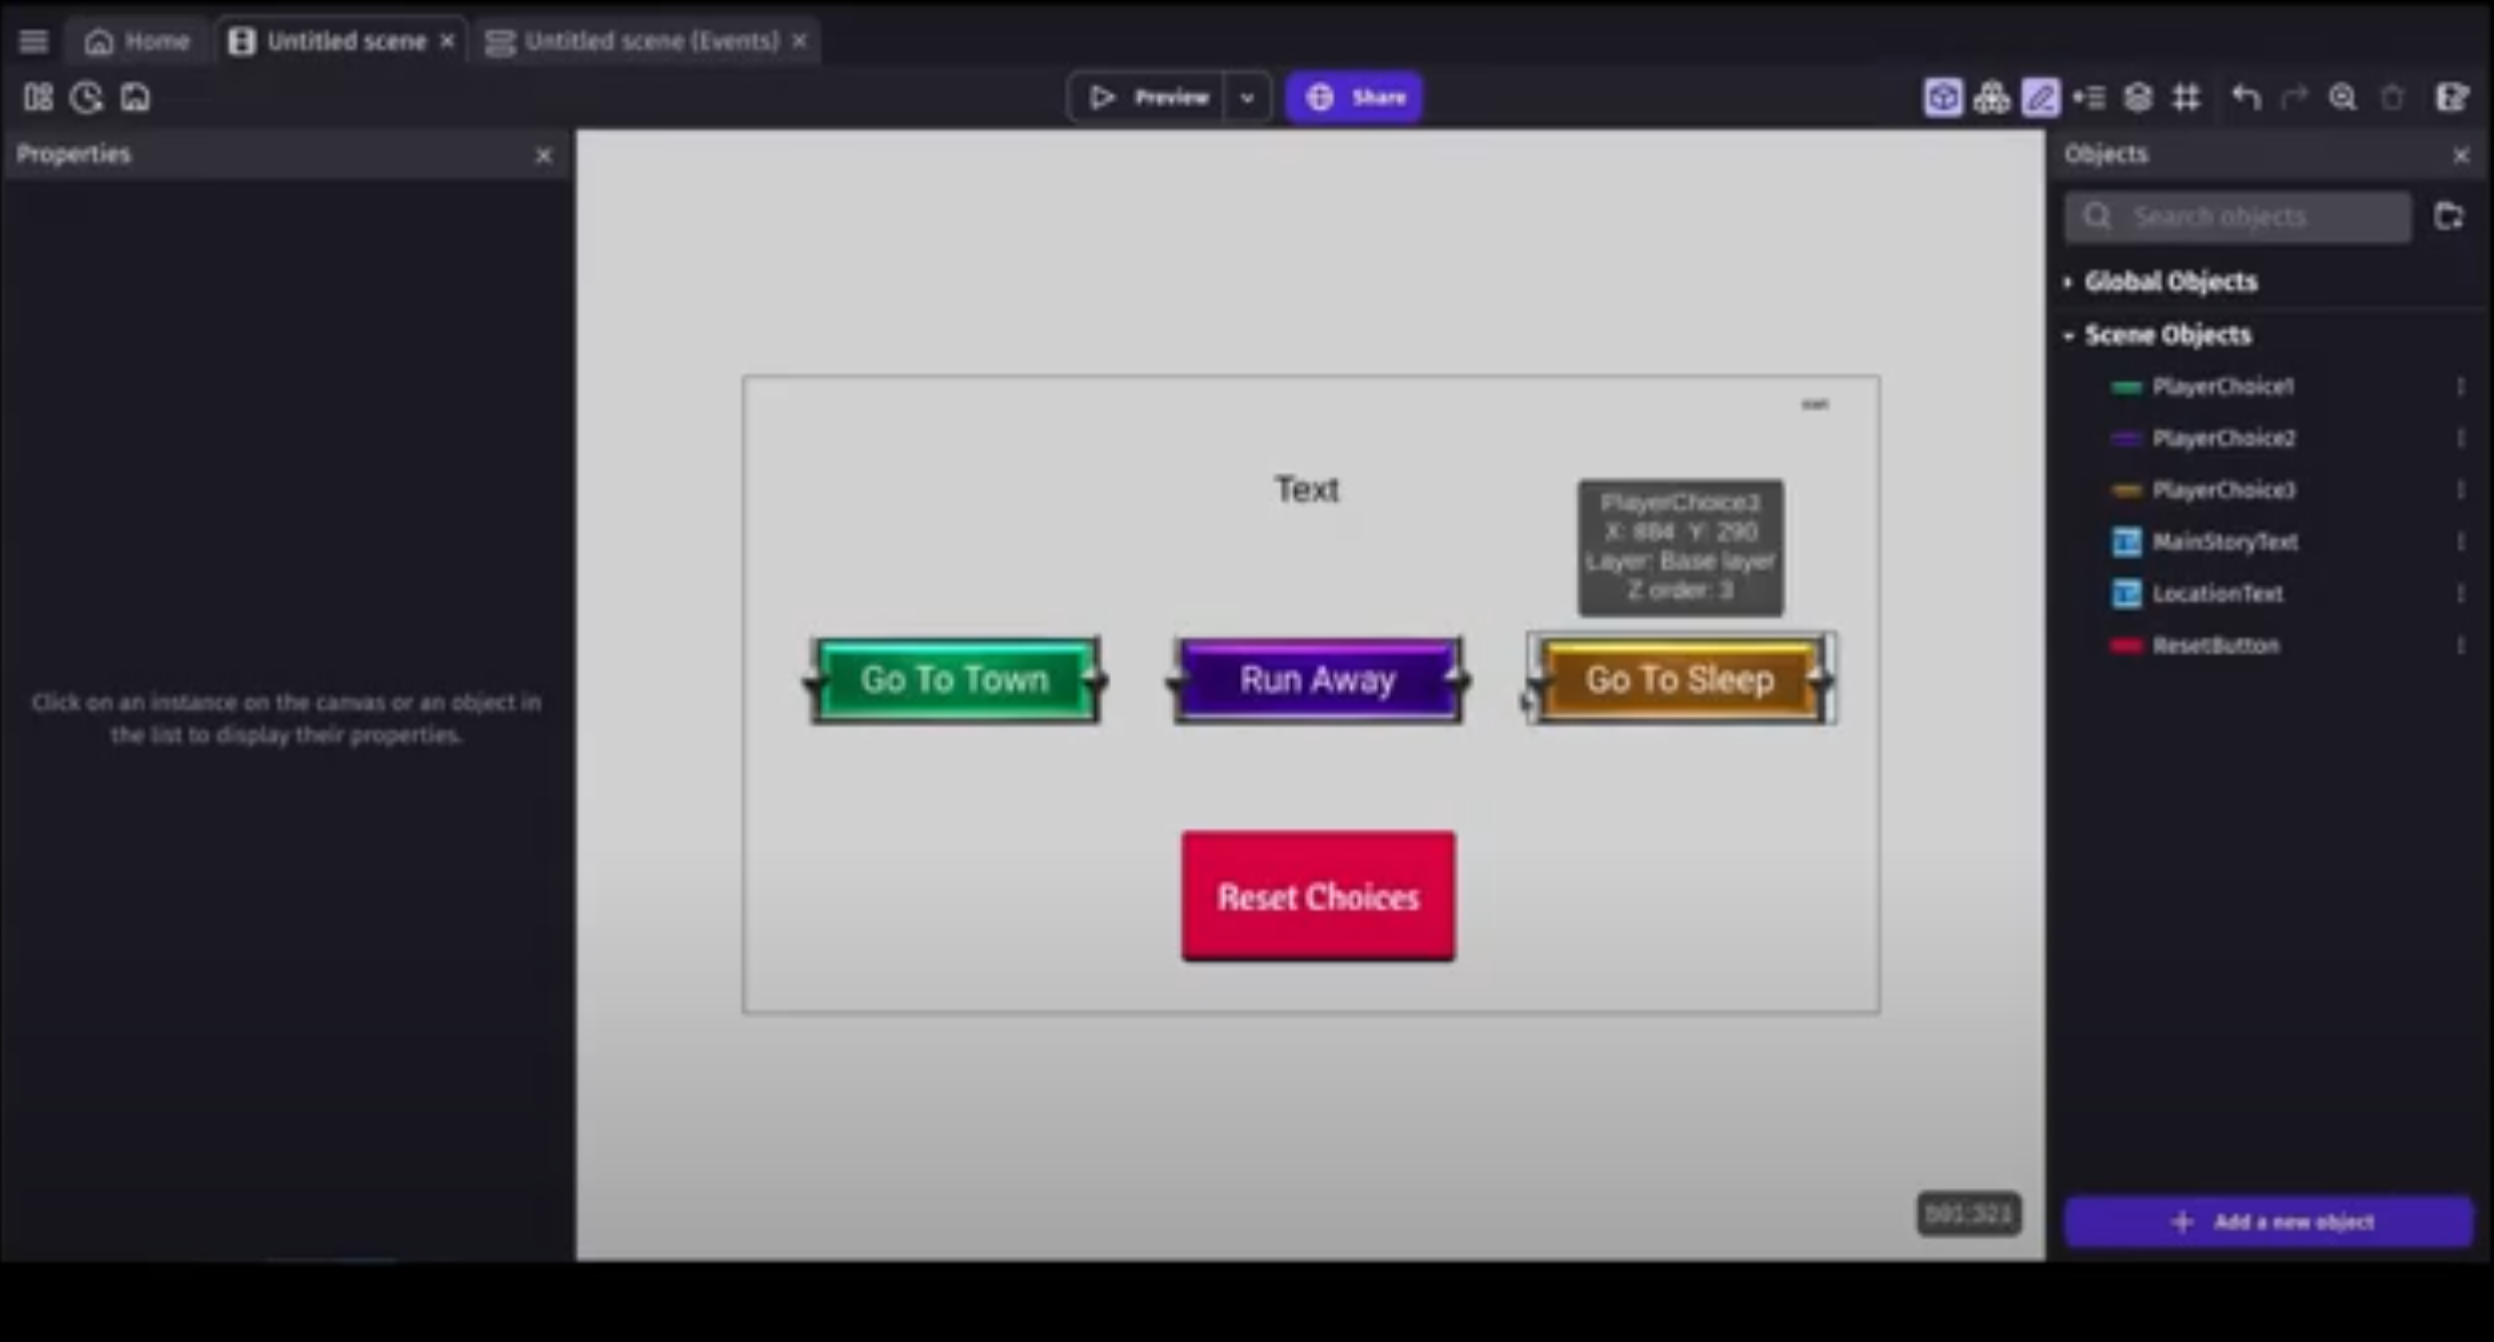
- Click on the "Objects" tab on the right and then click "+ Add a new object"
- Choose "Button" from the list of object types
- Name your Button "PlayerChoice1" and adjust the text size and font as necessary
- Set the initial text to "Go To Town"
- Drag and drop the text object onto your scene to place it
- Repeat this two more times naming the new buttons "PlayerChoice2" with the initial value of "Run Away" and "PlayerChoice3" with the inital value of "Go To Sleep"
- Click on the "Objects" tab on the right and then click "+ Add a new object"
- Choose "Text" from the list of object types
- Name your text object "MainStoryText" and adjust the text size and font as necessary
- Drag and drop the text object onto your scene to place it
- Do this again naming the text object "LocationText". Make it smaller and place it in the upper right corner to track the location you currently are at.
- PRO TIP: Use text on screen to track values of variables for better and fater testing!
- Click the "Project Manager" button in the upper left
- Click the three dots next to your main scene and select "Edit scene variables"
- Add a new variable called "CurrentChoice" and set the intial value to "start"
- Click on the "Objects" tab on the right and then click "+ Add a new object"
- Choose "Button" from the list of object types
- Name your Button "ResetButton" and adjust the text size and font as necessary
- Set the initial text to "Reset Choices"
- Drag and drop the button onto your scene to place it
- Open the Events sheet
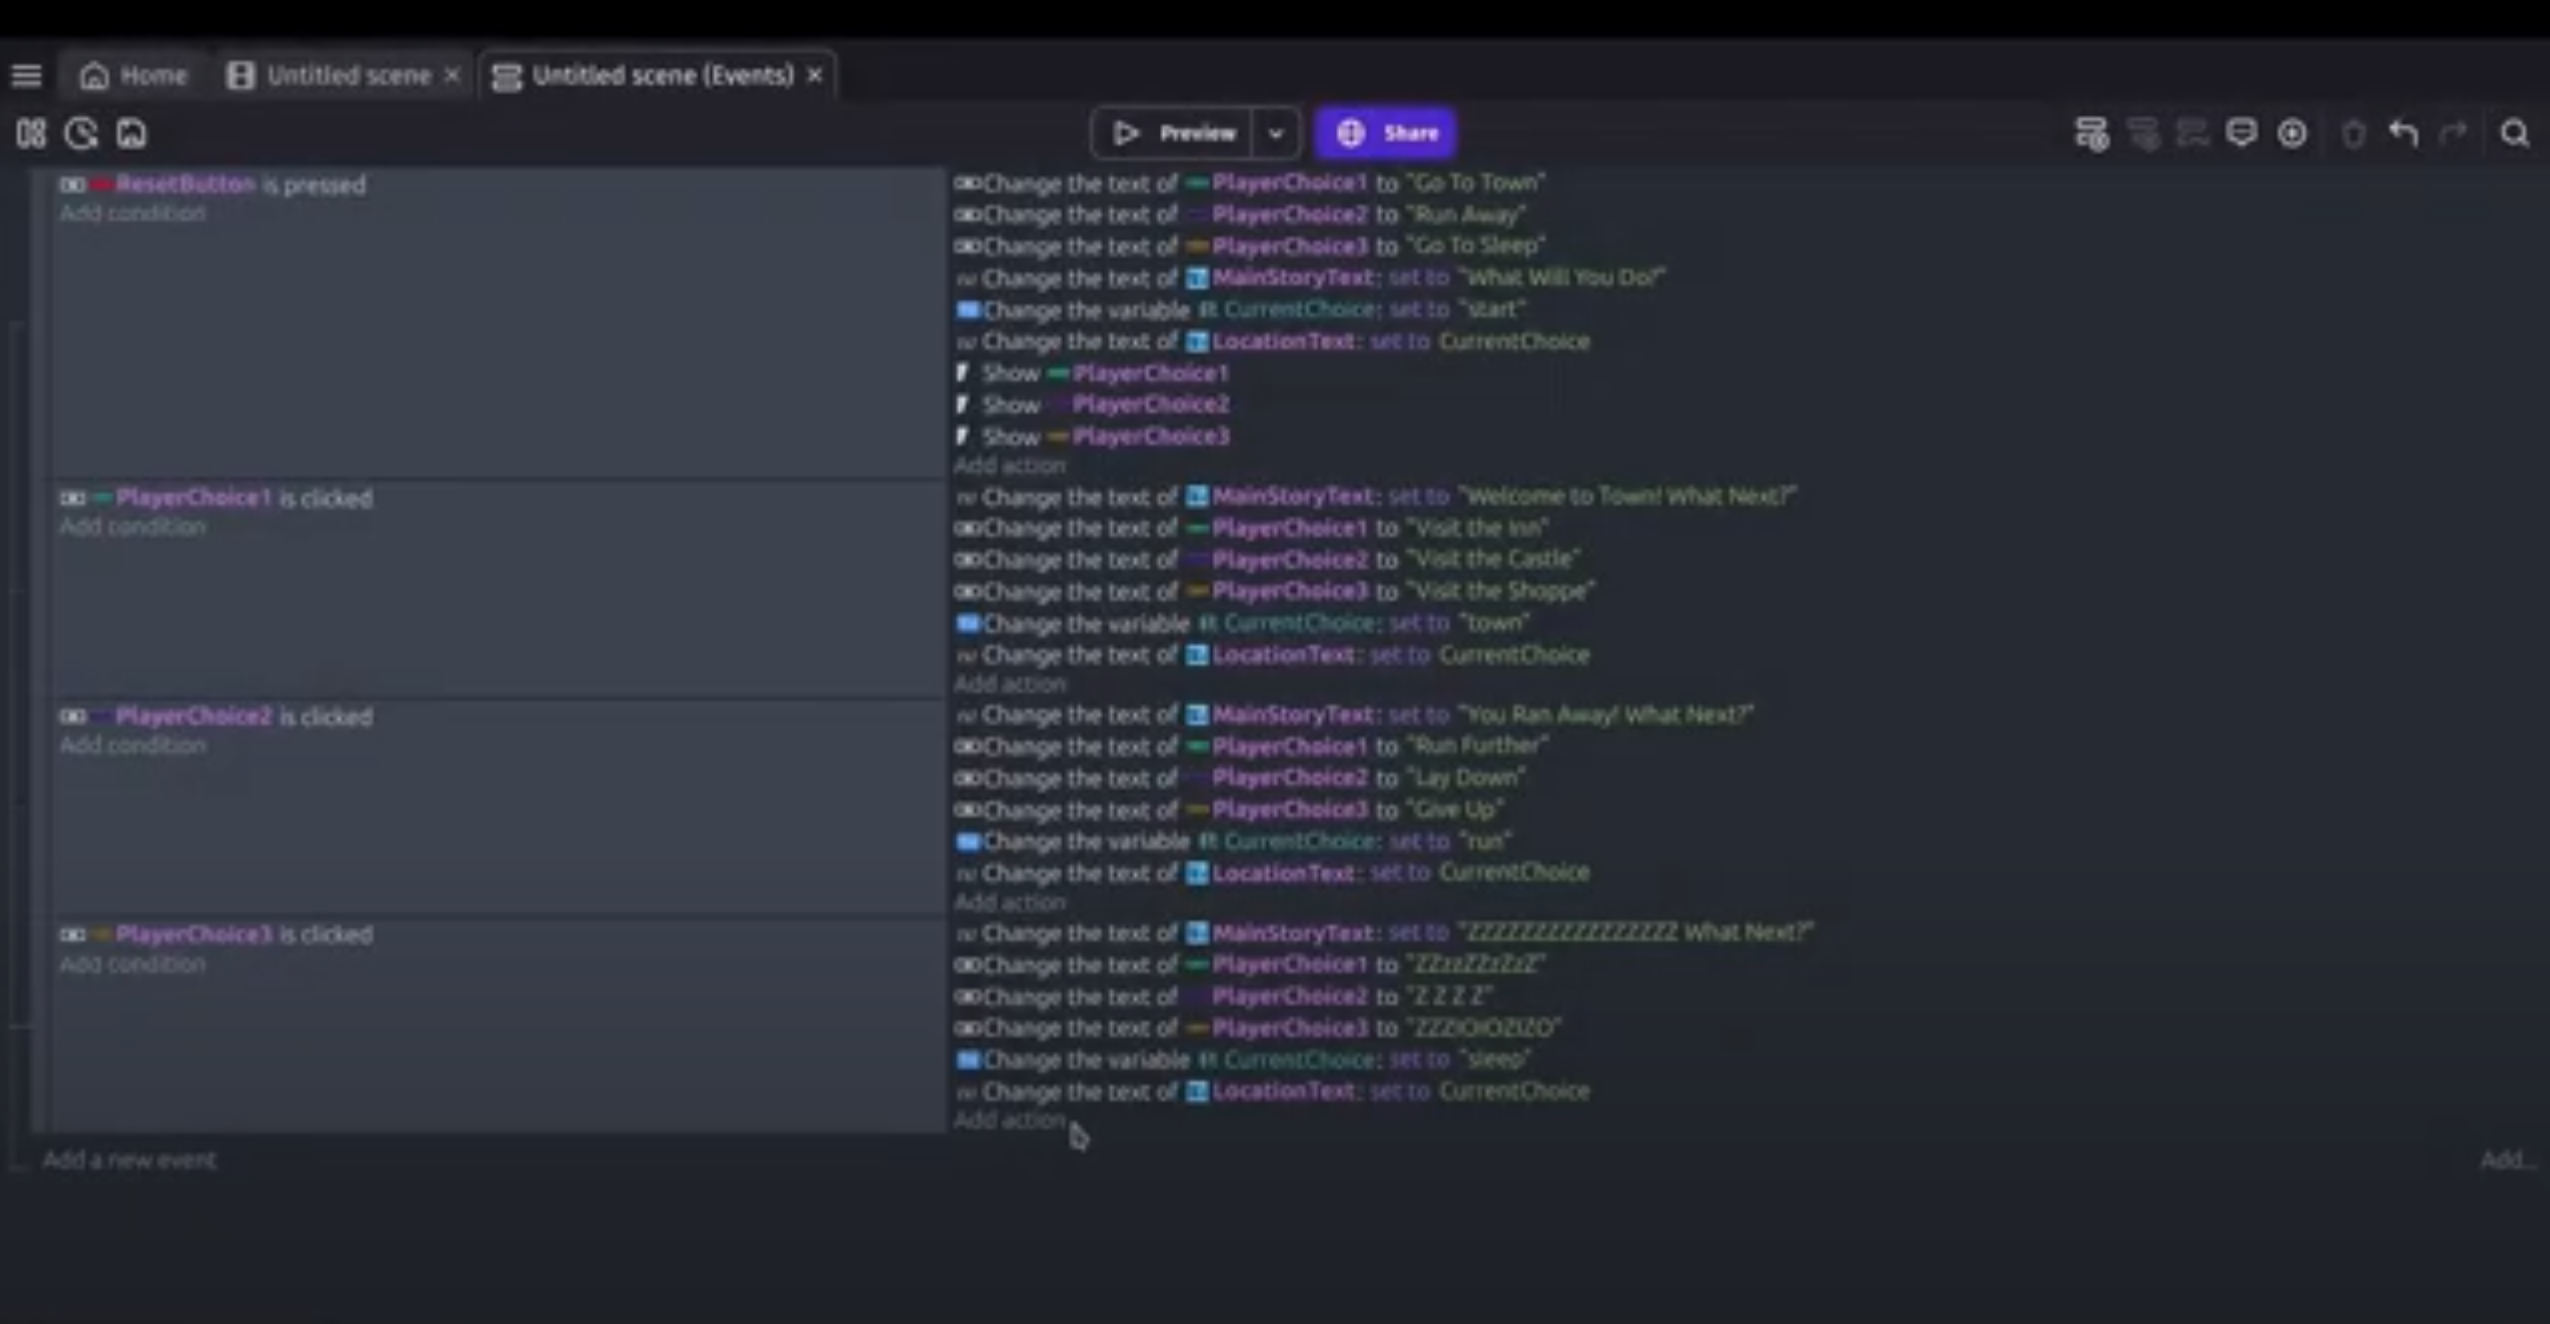
- Add a new event and click "Add condition"
- Select the "ResetButton" and the "is pressed" condition and hit Ok to save
- Add a new action and Choose the "PlayerChoice1" button object. Select the "Label Text" action and set the value to "Go To Town". Repeat for the other two buttons with "Run Away" and "Go To Sleep" as the text values.
- Add another action and select the "MainStoryText" object and the "text" action. Set the value to "What will you do?"
- Add another action and choose the "Change variable value" from the other actions tab. Select the "CurrentChoice" variable and set it to "start"
- Add another action and select the "PlayerChoice1" object and the "Show" action. Repeat for the other buttons.
- Open the Events sheet for your scene
- Add a new event and a new condition for the event. Select the "PlayerChoice1" object and the "is clicked" action and hit Ok to save the new condition.
- Add another condition checking the variable "CurrentChoice" is set to "start"
- Add a new action selecting "MainStoryText" as the object, "text" as the action and set the value to "Welcome to Town! What Next?".
- Add another action with "PlayerChoice1" as the object and "label text" as the action, setting the value to "Visit the Inn".
- Repeat this with "PlayerChoice2" and "PlayerChoice3" setting their values to "Visit the Castle" and "Visit the Shoppe".
- Add another action to change the varaible "CurrentChoice" to "town".
- Add a final action choosing "LocationText" as the object, "text" as the action and set the value to our variable CurrentChoice
- Copy and paste the entire block twice and fill out the pasted blocks for "PlayerChoice2" and "PlayerChoice3"
- Click on the play icon to preview the scene
- Try clicking the buttons and test what happens in different cases
- PRO TIP - Check your game along the way to ensure things work the way you expect
04 Use a Decision Tree
Here we will take you through some ways to explore the choice mechanic using your simple decision tree
- Try adding a new scene variable of type "Array" to track the choice history
- Can you add another step deeper to the "Go To Town" tree?
- Are there any other ways you would like to expand on choice?

Combine two game mechanics LUCK AND CHOICE
You can create many games with just a single mechanic,
but combining game mechanics is where we uncover unique forms of fun...
05 Add luck to decisions
Let's modify our decision tree to add a little luck to the equation. Recombine mechanics in many ways for endless gameplay possibilities.
Check out steps to combine luck into decision tree
Not sure where to start?
Grab our sample code for steps below at GitHub!
- Open GDevelop and click on "Open a Project."
- Open the project you worked on in the previous tutorial for Choice Tree or open the project template from Github
- Click the "Project Manager" button in the upper left
- Click the three dots next to your main scene and select "Edit scene variables"
- Add a new variable called "CurrentRoll" and set the type to a "number" with value "0"
- Open the event sheet
- In the "PlayerChoice2" isClicked event we are going to add a dice roll for chance to run away
- Add a new action and choose the "Change variable value" action of the "CurrentRoll" variable setting the value to RandomInRange(1,100)
- Add a new SubEvent to the event.
- Add a condition to the SubEvent check the "variable value" action of the "CurrentRoll" to be < 25
- Add an action to the SubEvent choosing "MainStoryText" as the object and "text" as the action setting the value to "You Failed to Run Away!"
- Create 2 more subevents for a "CurrentRoll" >= 25 and < 75 setting the "MainStoryText" to "You Made It" and a "CurrentRoll" >= 75 setting the "MainStoryText" to "You ran faster than ever!"
- Click on the play icon to preview the scene.
- Test out the Run Away button and see if you get the different results
- How would you hide the buttons after you click "Run Away" so that the UI is cleaner?
- Can you display the roll number somewhere for easier testing?
06 Your turn
Consider how to include luck and choice in your game?
How will you include luck in your game?
What choices are made in your game?
How does luck work in your favorite games?
What are some examples of Choice in your favorite game?
How might a RNG be incorporated into your game?
Can you think of different ways to integrate randomness into a decision tree?
Get inspired
Check out these games to modify or recreate to explore more ways to use RNG in games:
Build an experience
Use these a template to kickstart your game...add elements and try manipulating RNG to introduce luck into your game.
Share with us
Connect with our Brand page inside GDevelop and save your game with us!